.png)

.png)


 (Custom).png)
.png)
This Skye/Bind guide was created with the assistance of Fnatic Valorant team, so look out for the Fnatic Q&A sections for professional advice, and bookmark this page so you can refer back when creating your strategies.
Skye is a popular Inhibitor with valuable scouting abilities and performs extremely well when the fighting starts. Skye enables you to forge a path for your team, whilst providing healing support and aiding attack or defense strategies.
The most common role for Skye is to scout the map for enemies with her Seekers, and hamper the movements of the opposing team. Whether you are playing attack or defense, Skye plays a vital role on Bind. This guide and pro tips from Fnatic’s Valorant team will enable you to get the most out of your plays.
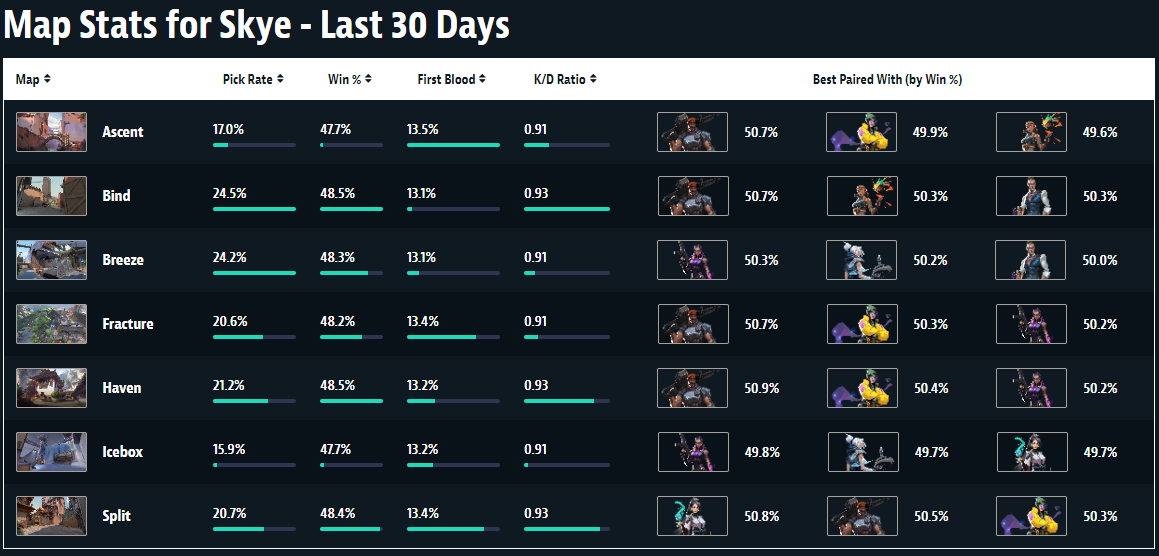
According to ValorBuff, Skye is the most popular agent on Bind at the time of writing. This is not uncommon, and you will also see her paired with Brimstone, Chamber and Raze.
In this Skye/Bind Guide
- Bind Callouts
- Attacking On Bind
- Post Plant
- Final Pro Tips
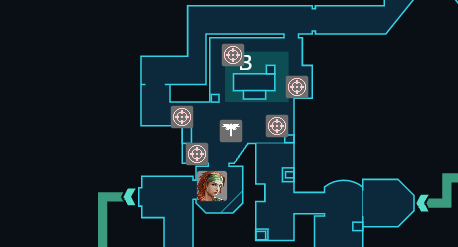
Bind Callouts
Let’s start with the Callouts for Bind map, which you can view and download below.
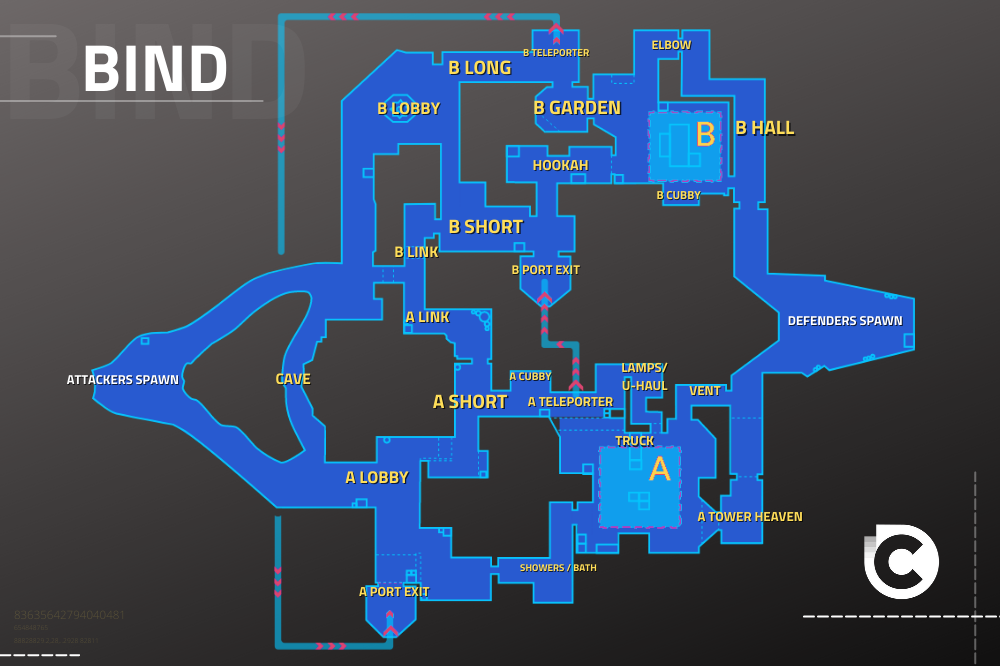
It is always recommended to play a map until you have the callouts completely committed to memory, as map awareness is key to playing Valorant competitively. Usually, when you’re part of a close team, you will have your own callouts for certain maps, but these (above) are the most common you’ll hear.
Attacking On Bind With Skye
A Executes
Note: Flash = Hawk/Guiding Light & Dog = Trailblazer
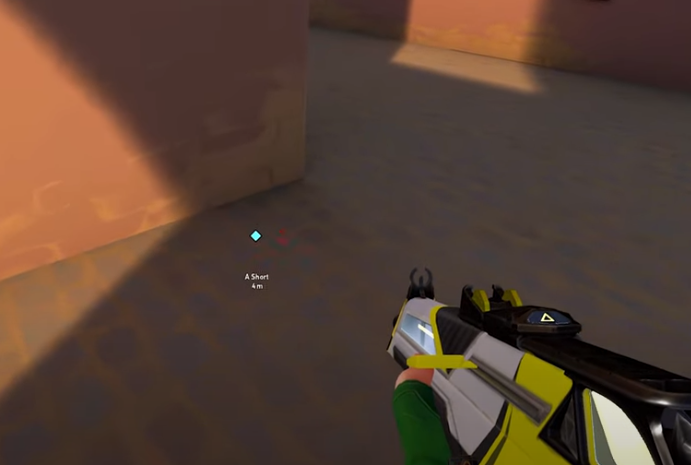
A Short
The first attack strategy favoured by pros involves A Short, which is a pivotal area on the map during the first few moments of the attack. Making your way from the spawn to A Lobby, then into A Short, you will need to position yourself against the corner of the wall facing towards A.
Using Trailblazer, you are going to clear A Cubby, U-Haul and potentially also get a slight glimpse into A site.
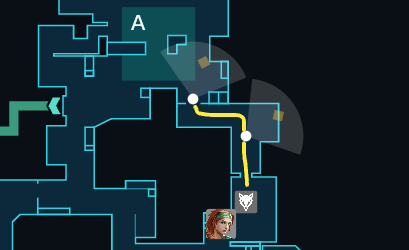
You then need to return to A Lobby, and send out your Flash (Guiding Light) ability to enable your team to move on A. You will send your Flash against the wall of the building (see below), and as it makes a sharp turn around the corner, you should pop the flash to blind any enemies on the backside of this building (on A).
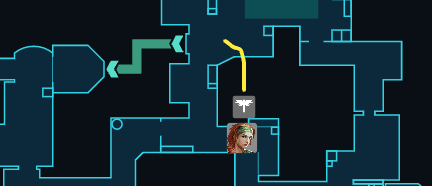
At this point, your team can push into A. You will come round into A Short, send a Flash into U-Haul and pop. This allows you to move into A with your team, and clear the backsite and mop up any enemies who are pushing.
Showers Execute
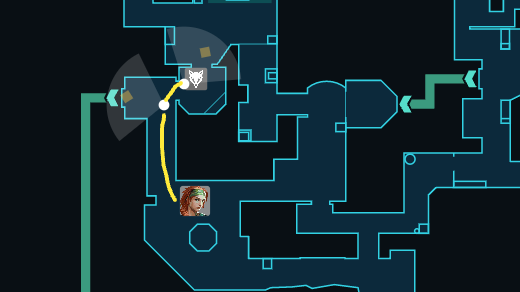
On the other side of A Short, you can clear A by taking the Showers route, and execute from this side instead. Position yourself at the corner of the wall and send Trailblazer through to check the corners and cubby on the way to A. You might get lucky and find someone hiding in the cubby/boxes on your right as you enter A, or at the very least clear the area to move forward.
On the approach to A, you can Flash through a hole in the roof, sending it into the main area of A. Pop the flash just before you go through the entrance to A to get good coverage and control before you enter the site. An alternative is sending the Flash round the corner as you near A site.
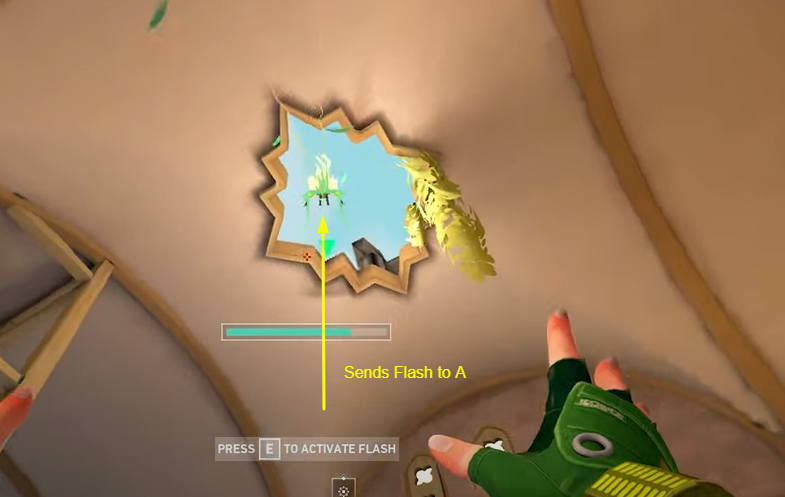
Once you are in the open area of A, you can pick off anyone thanks to the Flash, and your team can move freely. Sending another Flash through A Tower Heaven or even into spawn is a good idea, just be careful you’re not hitting teammates.
B Executes
You have some good options on attack with B site, two of which are approaching from B Long or from B Short/Hookah.
B Long Execute
The first thing you want to do on the approach to the site via B Lobby and B Long is use Trailblazer to scout the B TP area and B Garden cubby. An alternate approach would be sending Trailblazer from a little closer to site, but you risk getting caught out by hiding enemies.
The next ability you should use is Flash, to blind enemies who are closer to you (you may even get an angle on anyone at the backsite). Pop the Flash quite high so you get good coverage: